If you sell clothing online, your product photos are the single most important factor in whether a shopper clicks "Add to Cart" or keeps scrolling. Unlike physical retail, your customers cannot touch, feel, or try on your garments. Your images are the entire shopping experience.
The numbers tell a compelling story. According to industry research, 75% of online shoppers rely on product photos when making a purchase decision, and clothing is the most returned product category in ecommerce, with return rates between 20% and 40%. The number one reason? The item "looked different in person" than it did online. Poor clothing photography does not just lose sales -- it actively generates costly returns that eat into your margins.
The good news is that you do not need a professional studio or a five-figure budget to capture clothing photos that convert. Whether you are launching your first Shopify store, listing vintage pieces on Etsy, or scaling an established apparel brand on Amazon, this guide will walk you through everything you need to know about clothing photography -- from choosing the right equipment to post-processing your images for maximum impact.
By the end of this guide, you will have a clear, repeatable workflow for producing professional-quality clothing product photography that builds trust with your customers and drives sales.
Equipment You Need for Clothing Photography
Before you take your first shot, let us go over the essential equipment. The good news: you can start with gear you likely already own and upgrade over time as your business grows.
Camera (DSLR, Mirrorless, or Smartphone)
You do not necessarily need an expensive camera to photograph clothes well. Modern smartphones like the iPhone 15 Pro or Samsung Galaxy S24 Ultra produce images with enough resolution and color accuracy for ecommerce listings. That said, a dedicated camera gives you more control over depth of field, focus, and image quality in challenging lighting conditions.
- Budget option: A recent smartphone with a good camera (iPhone 13 or newer, Samsung Galaxy S22 or newer)
- Mid-range: An entry-level mirrorless camera like the Sony a6400, Canon EOS R50, or Nikon Z30 with a 35mm or 50mm lens
- Professional: A full-frame mirrorless camera like the Sony a7 IV or Canon EOS R6 II with a 24-70mm zoom lens
Tripod
A tripod is non-negotiable for consistent product photography. It eliminates camera shake, ensures every shot is taken from the same angle, and frees your hands for styling adjustments. For smartphones, a phone mount adapter costs under $15. For cameras, invest in a sturdy tripod with a ball head -- expect to spend $50 to $150 for a reliable option that will last years.
Lighting (Natural or Artificial)
Lighting makes or breaks clothing photography. You have two main options:
- Natural light: Free and flattering. Shoot near a large window on an overcast day for soft, even illumination. Use a white foam board as a reflector to fill in shadows on the opposite side.
- Artificial light: Continuous LED panels or softbox kits give you complete control regardless of time of day or weather. A two-light softbox kit ($80 to $200) is the most popular setup for clothing product photography.
Backgrounds
A clean, consistent background keeps the focus on your garment. The industry standard is a pure white seamless backdrop, which works for most ecommerce platforms and makes background removal easier. A roll of white seamless paper (typically 53 inches wide) costs around $30 and provides a wrinkle-free, reusable surface. For lifestyle-oriented brands, consider neutral fabric backdrops, wooden surfaces, or textured papers.
Steamer for Wrinkles
Nothing undermines a professional clothing photo faster than wrinkles. A handheld garment steamer ($25 to $60) is far more effective than ironing for removing creases from clothing without risking scorch marks. Steam every garment immediately before shooting -- wrinkles show up in photos far more than they do to the naked eye.
Pins, Clips, and Styling Tools
Professional clothing photographers rely on a toolkit of hidden styling aids to make garments look their best:
- Bulldog clips and binder clips: Cinch fabric at the back to create a tailored fit on mannequins or models
- Straight pins and safety pins: Tuck excess fabric and secure hems
- Fashion tape (double-sided): Keep collars, lapels, and layers in position
- Tissue paper: Stuff sleeves, pockets, and bodices to create natural-looking volume
- Lint roller: Remove stray fibers, pet hair, and dust that show up under studio lighting
5 Methods to Photograph Clothes
There are five common approaches to clothing product photography, each with its own advantages. The right choice depends on your budget, brand aesthetic, and the type of garments you sell.
1. On-Model Photography
On-model photography features a real person wearing the garment. This is widely considered the gold standard for clothing because it shows shoppers how the item actually fits and drapes on a human body.
- Pros: Best for showing fit, proportion, and movement. Creates an aspirational, lifestyle feel that drives engagement. Shoppers can picture themselves wearing the item.
- Cons: The most expensive method. Professional model rates range from $100 to $500+ per hour, and you will also need a hair and makeup artist for polished results. Requires coordination of schedules, and shooting takes longer.
- Best for: Fashion-forward brands, premium apparel, activewear, and any brand that relies on lifestyle appeal.
If hiring professional models is outside your budget, consider asking friends or team members who match your target demographic to model. Many successful small brands take this approach and it adds an authentic, relatable feel to their listings.
2. Ghost Mannequin Photography
Ghost mannequin photography (also called invisible mannequin or hollow man photography) produces a 3D effect where the garment appears to be worn by an invisible person. The garment maintains its shape and form, showing the neckline, interior construction, and overall silhouette without the distraction of a mannequin or model.
Traditionally, this requires photographing the garment on a mannequin, then separately photographing the inside of the garment, and combining the images in Photoshop to remove the mannequin. It is a painstaking, multi-step process that demands strong photo editing skills.
This is where AI tools like PixFocal are changing the game. Instead of spending 15 to 30 minutes per image in Photoshop, you can upload a photo of clothing on a mannequin and let AI automatically create the ghost mannequin effect in seconds. The technology intelligently removes the mannequin while preserving the garment's natural shape, shadows, and fabric texture.
- Pros: Professional, clean appearance. Works for almost every garment type. Significantly cheaper than on-model photography. Consistent results across your entire catalog.
- Cons: Traditional method requires advanced Photoshop skills. Does not show real-world fit on a body. AI-powered tools have made this significantly faster and more accessible.
- Best for: Most ecommerce clothing brands, Amazon sellers, eBay stores, and any seller who needs a professional look at scale.
3. Flat Lay Photography
Flat lay photography involves arranging the garment (and optionally accessories) on a flat surface and shooting directly from above. This bird's-eye perspective is popular on social media and works especially well for casual, lifestyle-oriented brands.
- Pros: Simple setup, no mannequin or model needed. Creative styling opportunities. Excellent for social media content and lookbook-style imagery.
- Cons: Does not show how the garment fits or drapes on a body. Can be tricky to get garments to lay perfectly flat without bunching. Perspective distortion can make items look different from reality.
- Best for: T-shirts, casual wear, children's clothing, accessories, and brands with a lifestyle-focused aesthetic.
Styling tips for flat lays: Use tissue paper underneath to create subtle dimension. Roll sleeves naturally rather than folding them rigidly. Add complementary props like sunglasses, jewelry, or a coffee cup to tell a story -- but keep the garment as the clear focal point.
4. Hanger Photography
Hanger photography is the simplest method: hang the garment on a hanger against a clean background and shoot. While it is fast and requires minimal equipment, the results tend to look less polished than other methods.
- Pros: Fastest setup and shooting time. Minimal equipment needed. Easy to achieve consistency across products.
- Cons: Looks less professional than other methods. Garments can appear flat and shapeless. The hanger itself can be distracting. Limited styling options.
- Best for: Lightweight garments like blouses and shirts. Quick secondary shots for additional product views. Sellers who need to photograph large volumes quickly (resale, thrift, vintage).
5. Product-on-Stand Photography
Using dress forms, busts, or torso stands gives clothing a three-dimensional, sculptural quality. Unlike mannequins (which you intend to edit out), dress forms are displayed intentionally as part of the presentation.
- Pros: Adds a boutique, artisanal feel. Shows garment shape and drape. No post-processing needed to remove the form.
- Cons: Dress forms come in limited sizes. Not suitable for pants, skirts below knee-length, or full outfits. The vintage look may not suit all brand aesthetics.
- Best for: Luxury brands, boutique shops, vintage sellers, and garments that shine on upper-body displays (tops, jackets, vests, scarves).
Step-by-Step: Photographing Clothes at Home
Now that you understand the methods, here is a practical, step-by-step workflow for photographing clothes at home. This process works regardless of which method you choose.
Step 1: Prepare Your Space
Choose a room with enough space to set up your background, lighting, and camera. You need at least 6 to 8 feet of depth and 5 feet of width. Clear the area of clutter and distractions. If you are using natural light, pick a room with large north-facing or south-facing windows (depending on your hemisphere) that provide consistent, indirect light.
Step 2: Set Up Your Background
Hang your white seamless paper from a backdrop stand, or tape it to the wall and let it curve gently to the floor to create a seamless "infinity" look. Make sure the background extends far enough to cover the full frame of your widest shot. Smooth out any wrinkles or creases -- these will show up in your photos and look unprofessional.
Step 3: Position Your Lighting
For a simple two-light setup, position one light at a 45-degree angle to the left and the other at a 45-degree angle to the right, both slightly above the garment. This creates even, flattering illumination with soft shadows that add dimension without harshness. If using natural light, place your setup next to the window with a reflector on the opposite side to fill in shadows.
Take test shots and adjust until you achieve even coverage with no hot spots or deep shadows on the garment. Pay special attention to the neckline, folds, and seams -- these areas tend to collect shadows.
Step 4: Style the Garment
This is where many photographers rush and it shows in the final images. Take your time with garment preparation:
- Steam the entire garment thoroughly, paying attention to collars, cuffs, and hems.
- Use a lint roller to remove all dust, fibers, and hair.
- Dress the mannequin (or lay the garment flat), then use clips at the back to create a tailored look from the front.
- Stuff sleeves and bodices with tissue paper for natural volume.
- Secure any loose elements with fashion tape or pins.
- Step back and look at the garment from the camera's perspective -- adjust anything that looks unnatural or sloppy.
Step 5: Set Camera Settings
For consistent, sharp clothing photos, use manual mode (or aperture-priority mode if you are less experienced). We will cover specific settings in the next section, but the key principle is: prioritize sharpness and accurate color above all else.
Step 6: Shoot Multiple Angles
Customers want to see every aspect of a garment before buying. For each item, capture at minimum:
- Front view: The primary listing image. Perfectly centered and symmetrical.
- Back view: Shows construction, closures, and back design details.
- Side view: Reveals the silhouette and how the garment drapes.
- Detail shots: Close-ups of fabric texture, buttons, zippers, labels, stitching, and any unique features.
- Tag/label shot: Builds trust by showing the brand label, size, and material composition.
Shoot more than you think you need. It is much easier to delete extra images later than to re-set up a shoot for a missing angle.
Step 7: Edit and Post-Process
Even the best raw photos need some post-processing. Focus on making your images clean, consistent, and accurate. We will cover detailed editing tips in a later section.
Before & After: Ghost Mannequin Effect with PixFocal AI
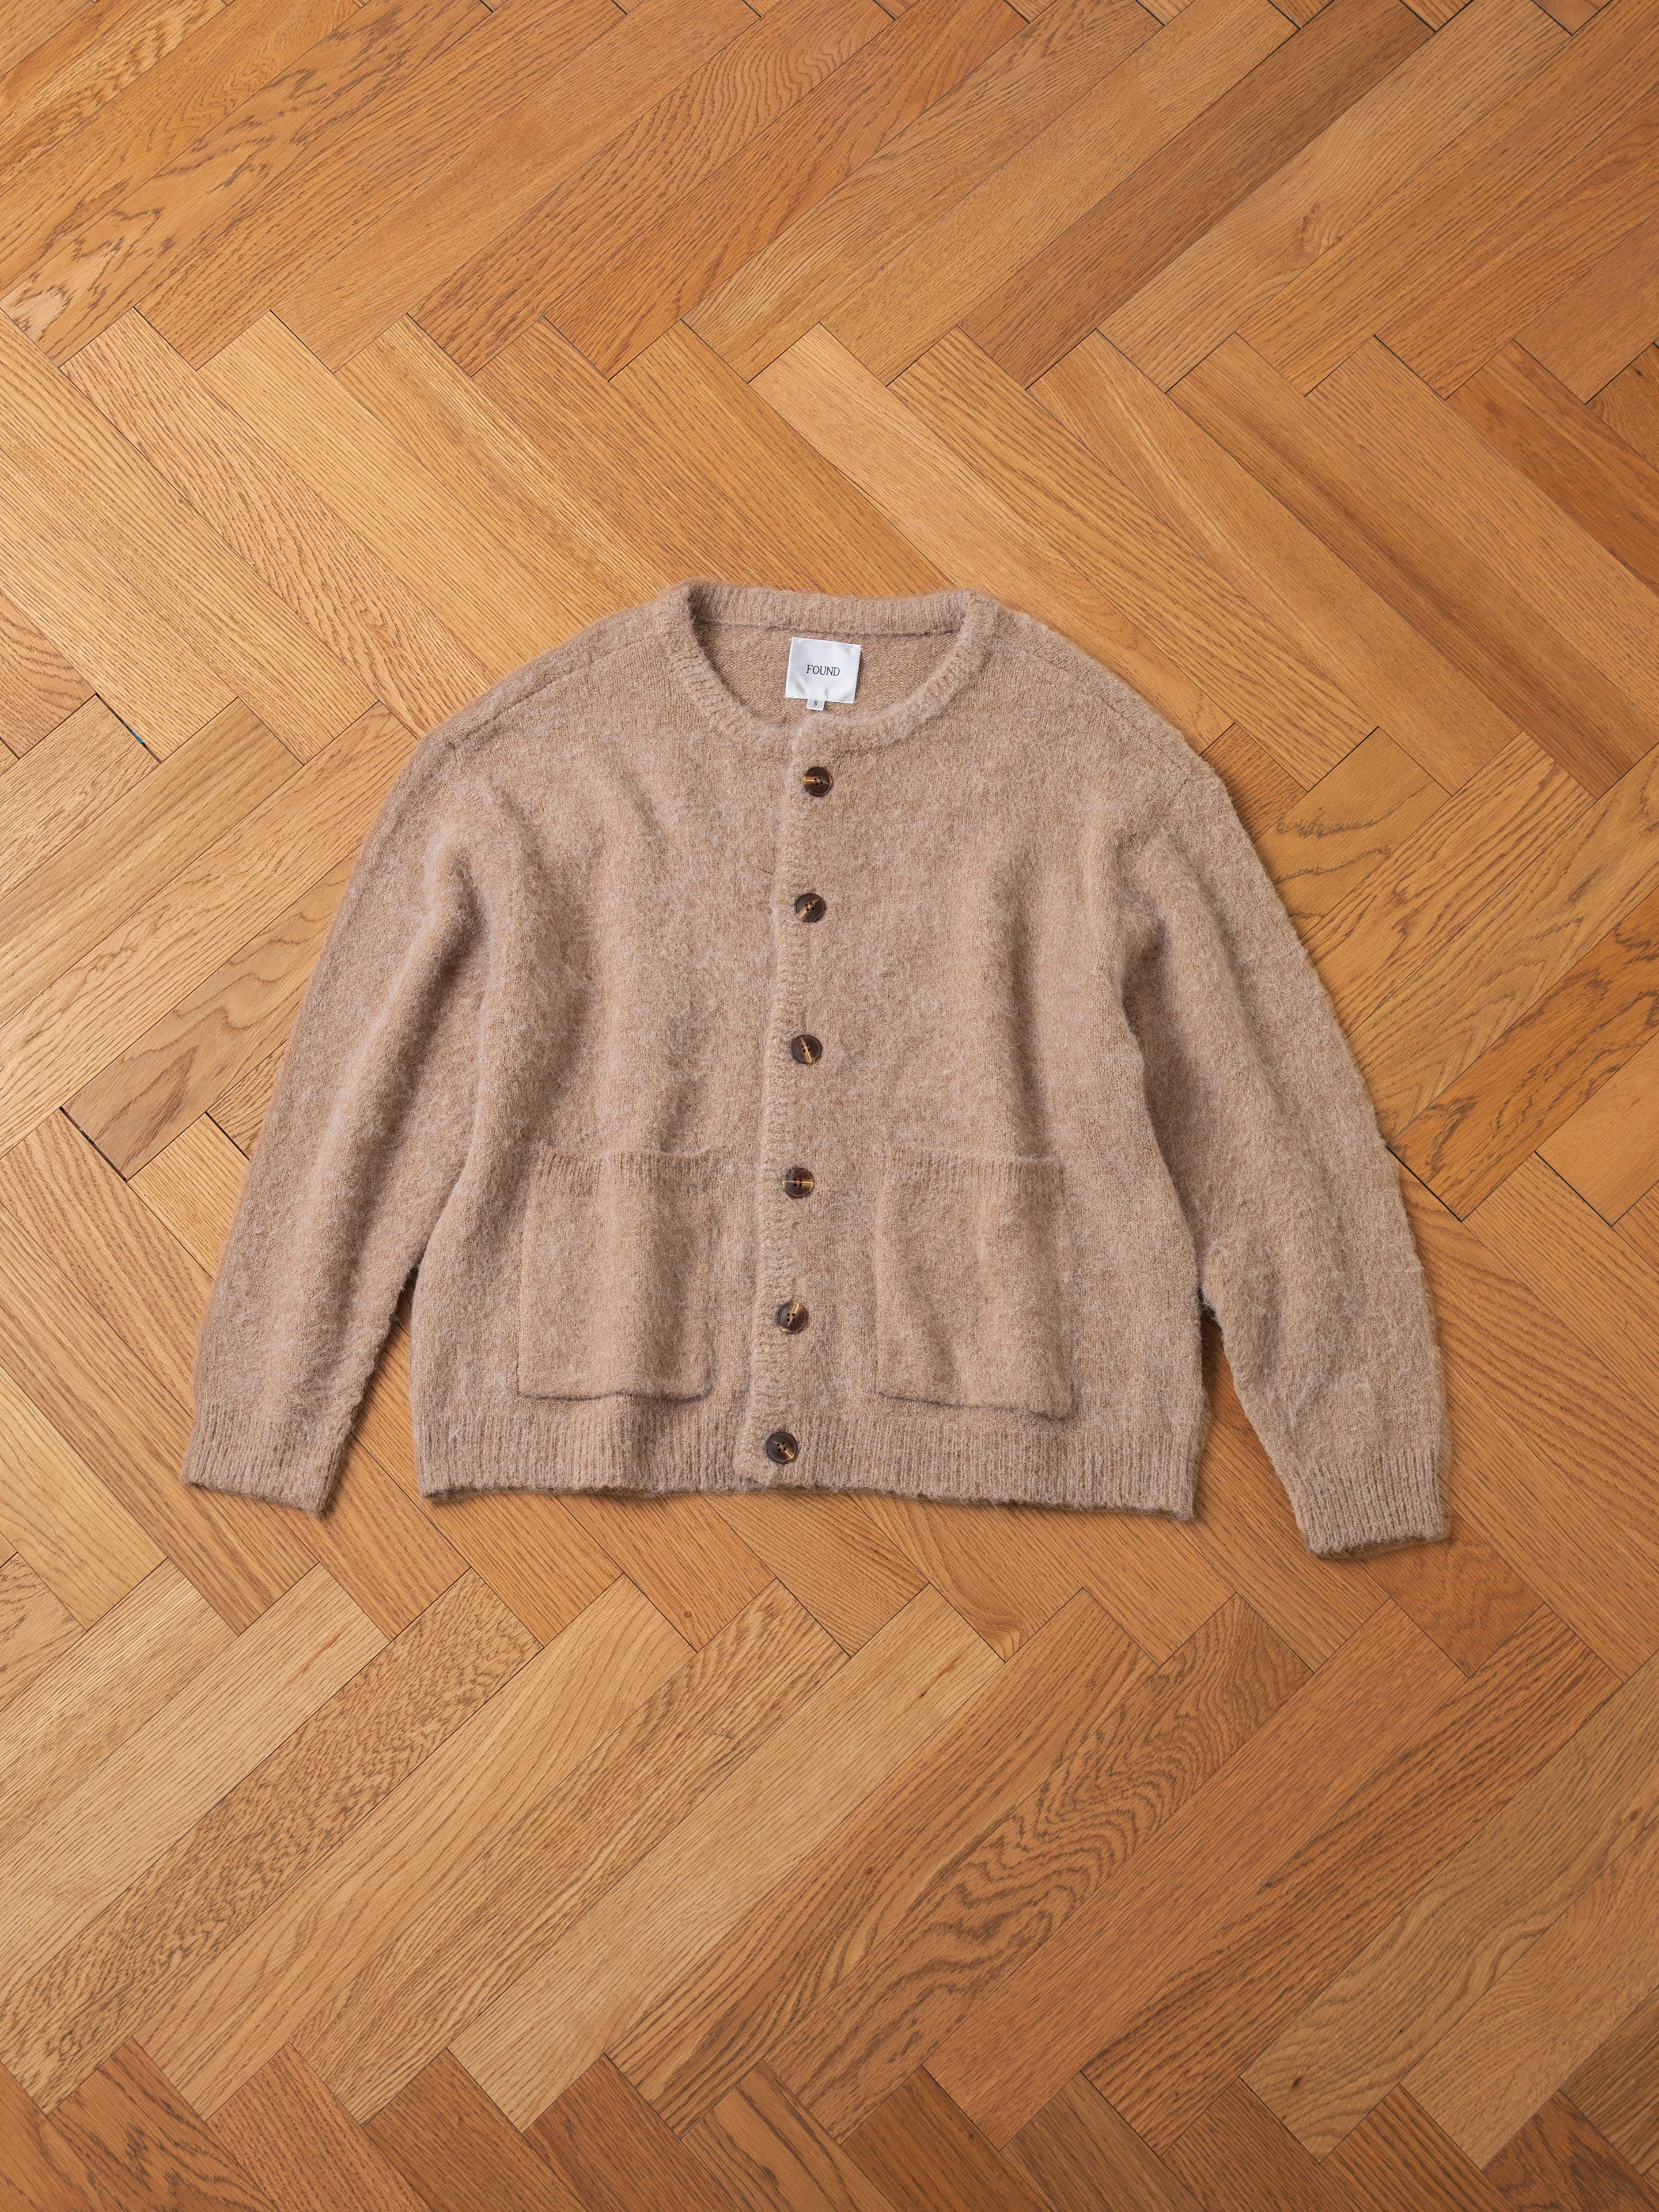
Before: Clothing on mannequin
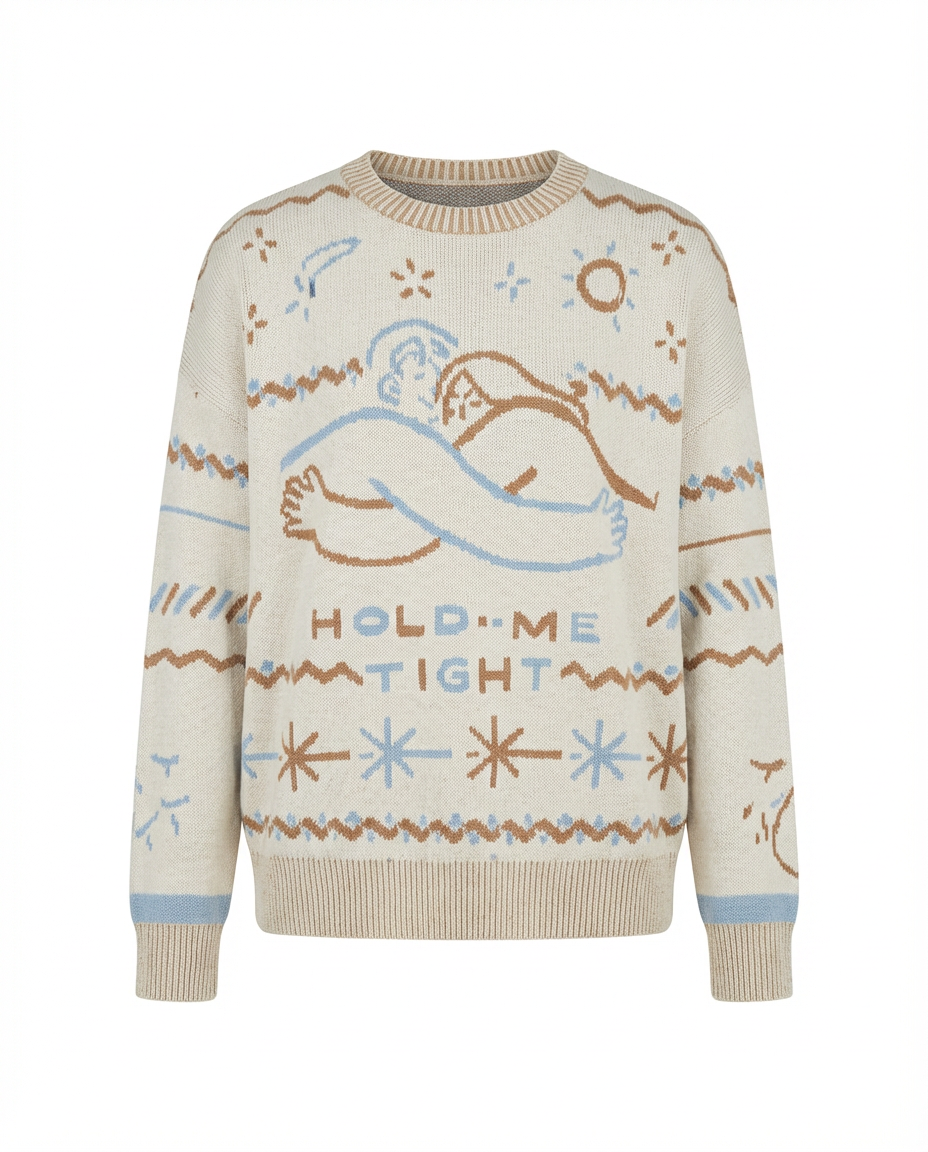
After: Ghost mannequin effect by PixFocal
Camera Settings for Clothing Photography
Getting your camera settings right ensures sharp, well-exposed images with accurate colors. Here are the recommended settings for clothing product photography:
| Setting | Recommended Value | Why |
|---|---|---|
| Aperture | f/8 - f/11 | Maximum sharpness across the entire garment. Avoids the soft edges you get at wide apertures. |
| ISO | 100 - 400 | Keep as low as possible to minimize noise/grain. Use 100 with good lighting, up to 400 if needed. |
| Shutter Speed | 1/125s or slower with tripod | With a tripod, you can use slower speeds to keep ISO low. Use a remote shutter or timer to avoid camera shake. |
| White Balance | Match your lighting (5500K for daylight) | Accurate white balance is critical for clothing. A color cast can make a burgundy shirt look brown or a navy blazer look black. |
| File Format | RAW (or RAW + JPEG) | RAW files retain maximum data for post-processing, allowing you to correct exposure and white balance without quality loss. |
Smartphone tip: If you are shooting with a phone, use the native camera app's "Pro" or "Manual" mode if available. Lock the exposure and white balance so they do not shift between shots. If your phone does not have manual controls, shoot in well-lit conditions and use a third-party app like Halide (iOS) or Camera FV-5 (Android) for more control.
Post-Processing Tips
Great clothing photos are made in editing just as much as they are made in camera. Here are the key post-processing steps for professional clothing product photography:
White Balance Correction
Even with careful in-camera white balance, you may need to fine-tune in post. Use a gray card or the white background as a reference point. Your whites should be truly white (RGB values near 255, 255, 255) and the garment colors should match reality as closely as possible. When in doubt, slightly cooler tones tend to look more professional than warm, yellowish images.
Background Cleanup
Remove any imperfections in the background -- scuff marks, shadows, uneven tones, or edges of your backdrop. For white background shots, most platforms expect a pure white (#FFFFFF) background. You can achieve this by increasing exposure on the background or using the curves tool to push light grays to pure white.
Color Accuracy
Color accuracy is arguably the most important aspect of clothing photo editing. An inaccurate color representation leads directly to returns. Calibrate your monitor, compare your edited photos side-by-side with the actual garment, and adjust saturation and hue carefully. Be especially careful with reds, which tend to oversaturate, and blues, which can shift toward purple in certain lighting conditions.
Consistent Cropping and Sizing
Consistency across your product catalog builds trust and looks professional. Decide on a standard aspect ratio (square 1:1 for most platforms), centering, and margin for all your product images. Create a template or Photoshop action so that every image is cropped identically. The garment should occupy roughly the same proportion of the frame in every listing.
How AI Tools Speed Up Editing
Traditional post-processing for clothing photos can take 10 to 30 minutes per image -- and that adds up quickly when you have dozens or hundreds of SKUs. Modern AI-powered tools have dramatically reduced this time.
PixFocal, for example, automates the ghost mannequin effect, background removal, and image enhancement in seconds. Instead of manually masking mannequins in Photoshop layer by layer, you upload your photo and the AI handles the rest. This allows small teams to produce catalog-quality images at a pace that was previously only achievable by large studios with dedicated retouching departments.
Platform-Specific Photo Requirements
Each ecommerce platform has its own image specifications. Meeting (or exceeding) these requirements ensures your listings look their best and avoids rejection or suppression by the platform.
Shopify
- Recommended size: 2048 x 2048 pixels (square)
- Max file size: 20MB per image
- Format: JPEG, PNG, GIF, or WebP
- Tips: Shopify automatically generates multiple sizes for responsive display. Upload the highest quality you can within the file size limit. Use consistent aspect ratios across your store for a cohesive look.
Amazon
- Main image: Pure white background (RGB 255, 255, 255), product must fill 85% of the frame
- Minimum size: 1000 pixels on the longest side (for zoom functionality); 1600 pixels recommended
- Format: JPEG (.jpg), TIFF (.tif), PNG (.png), or GIF (.gif)
- Tips: Amazon is strict about main image requirements. No text, watermarks, borders, or props on the main listing image. Secondary images can show lifestyle contexts, details, and size charts.
Etsy
- Recommended size: 2000 pixels on the shortest side
- Aspect ratio: 4:3 (landscape orientation for search results)
- Format: JPEG, PNG, or GIF
- Tips: Etsy shoppers respond well to lifestyle imagery and styled shots. Use your first image to grab attention in search (natural light, styled flat lays perform well), and include clean product-only shots in the remaining image slots.
eBay
- Minimum size: 500 pixels on the longest side; 1600 pixels recommended
- Max file size: 12MB per image
- Format: JPEG, PNG, GIF, TIFF, or BMP
- Tips: Use a white or light gray background for the main image. eBay allows up to 24 photos per listing -- use them all to show condition, details, and measurements. For vintage or used clothing, photograph any flaws or wear honestly to reduce return disputes.
Common Mistakes to Avoid
Even experienced sellers make these mistakes with their clothing photography. Avoiding them will immediately set your listings apart from the competition.
Wrinkled Clothes
This is the most common and most avoidable mistake. Wrinkles scream "unprofessional" and make even high-quality garments look cheap. Always steam garments before shooting and check for new wrinkles that develop during styling. If you are shooting for hours, re-steam between garments as your equipment cools.
Inconsistent Lighting
Mixing lighting sources (daylight from a window plus overhead fluorescent, for example) creates unpredictable color casts and uneven exposure. Pick one lighting approach and stick with it for the entire shoot. If using natural light, shoot during the same time window each day to maintain consistency. Close blinds on other windows to prevent mixed light temperatures.
Wrong White Balance
A warm color cast makes whites look yellow, blacks look brown, and can shift the perceived color of the entire garment. A cool cast makes everything look clinical and bluish. Set your white balance before you start shooting and verify it with test shots. This single adjustment can be the difference between a garment that looks accurate and one that generates returns because "the color was not as shown."
Not Enough Angles
A single front-view photo is not enough to sell clothing online. Shoppers who cannot see the back, sides, and details of a garment are far less likely to purchase -- and if they do, they are more likely to return it. Aim for a minimum of five images per listing: front, back, side, close-up detail, and a styling or context shot.
Low Resolution Images
Blurry, pixelated, or overly compressed images destroy buyer confidence. Always shoot at your camera's highest resolution, export at the maximum quality your platform allows, and never upscale a small image. If a photo is not sharp at 100% zoom, reshoot it. Customers will pinch-to-zoom on mobile to examine fabric texture and construction details, and low-resolution images look especially poor in this context.
Start Photographing Clothes Like a Pro
Professional clothing photography does not require a professional studio. With the right equipment, a consistent process, and attention to detail, you can produce product images that rival major fashion brands -- all from the comfort of your home or office.
To recap the key principles:
- Invest in essentials: A good light source, a tripod, a clean background, and a garment steamer are more important than an expensive camera.
- Choose the right method: On-model, ghost mannequin, flat lay, hanger, or dress form -- pick the approach that matches your brand and budget.
- Prepare every garment: Steam, lint-roll, style, and inspect before shooting.
- Prioritize consistency: Same lighting, same angles, same background, same crop. A cohesive catalog builds trust.
- Edit for accuracy: Color accuracy, clean backgrounds, and consistent sizing are non-negotiable.
- Shoot more than you need: Multiple angles and close-ups reduce returns and increase conversions.
And if you want to streamline the most time-consuming part of clothing product photography -- the post-processing -- tools like PixFocal can automate the ghost mannequin effect, background removal, and image enhancement in seconds rather than hours. Whether you are photographing 10 garments or 10,000, AI-powered editing lets you maintain professional quality at any scale.